
Henna is a natural hair treatment. It has been valued for centuries due to its transformative properties. It is derived from the Lawsonia Inermis plant. It has special importance in hair care. For achieving optimal results, the process and highlighting depends on how long henna is left in hair. The influence of color outcome and its effectiveness depends on timing. We will learn how to prepare, apply and enhance your hair beauty with henna.
Table of Contents
Understanding Henna
The first question which arises in our mind is; What is Henna? As we know it is derived from the Lawsonia Inermis plant, its leaves are dried and grinded to powder form to make henna. The red-orange pigment called lawsone activates and binds with the protein in hair and skin. As a result we receive a range of colors from orange to deep red-brown. It is not only safe but also free of harsh chemicals present in hair dyes.
Pure henna gives vibrant red-orange color but different types of henna are also available in the market. The additional ingredients in henna are also herbal which gives an altering color spectrum. These henna mixes include indigo and amla which provide additional benefits or modifying color results.
The benefits of using henna include natural coloring, conditioning properties, strengthening and thickening of hair, improving scalp health and natural shine to your hair.
Preparing Your Hair for Henna
Wash your hair before applying henna. This will remove any dirt or oil from your hair which may hinder the henna absorption in hair. Use a sulfate-free shampoo to cleanse your hair thoroughly. Use hair conditioner after this, it will balance the moisture content. This will allow even color distribution and better conditioning benefits.
Make proper sections of your hair by using clips or hair ties. Start with four sections, two for the front-side and two for the back-side. Making further smaller sections will not only ease henna application but also help even color distribution.
One important point, don’t apply henna on freshly washed or wet hair. Let your hair dry completely and then apply henna. This will benefit not only vibrant color but also enhanced hair health.
Henna Mixing Techniques
Choosing the right henna powder is the first step for successful henna application. It is advisable to choose high quality and pure henna free from any contaminants or or additives. You can choose a product labeled as “Body Art Quality (BAQ)” which indicates its suitability for both hair and skin.
You can also choose on the basis of the color shade you want. Different henna powders provide different shades of red which range from orange to deep burgundy. Must read product labels carefully. Patch tests will help you tailor the mixture to your preference. Many products have additional natural ingredients like indigo and amla which help in achieving specific colors and enhance conditioning properties.
- Indigo: Adds depth and darkness to the henna color, producing shades ranging from brown to black.
- Amla: Enhances shine, conditions the hair, and can modify the color result, especially for those looking to tone down the red hues.
- Cassia: Often referred to as “neutral henna,” cassia provides conditioning benefits without adding significant color, making it suitable for those seeking a more subtle change.
Following is a step-by-step guide to achieving the desired texture:
- Measure the Henna: Start by measuring the henna powder according to your hair length and thickness. Use a non-metallic bowl to avoid any chemical reactions that may alter the henna’s properties.
- Add Liquid: Gradually add a liquid of your choice, such as warm water, herbal tea, or a mixture of both, to the henna powder. Stir continuously to avoid lumps.
- Consistency Check: Aim for a yogurt-like consistency. The mixture should be smooth, without any dry clumps. If it’s too thick, add more liquid; if it’s too thin, add a bit more henna powder.
- Dye Release: Allow the henna mixture to sit covered for several hours or overnight. This process, known as dye release, allows the lawsone pigment to activate, enhancing the color potency. The duration for dye release may vary depending on the henna type and temperature.
- Optional Additions: If you’re incorporating additional ingredients, such as indigo or amla, add them to the mixture after the initial dye release period and blend thoroughly.
Application Process

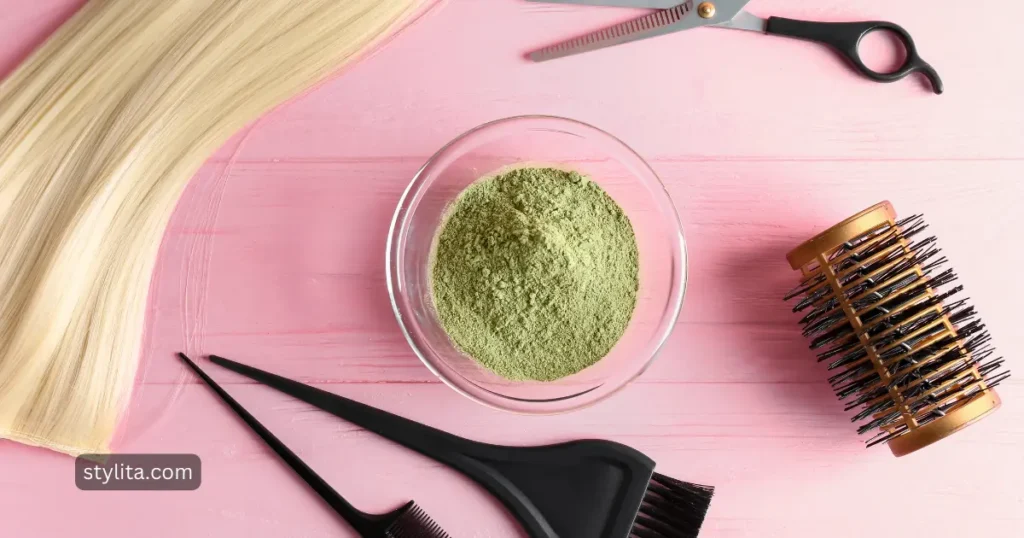
Before diving into the henna application process, gather the necessary tools and accessories to ensure a smooth and effective experience. Here’s a list of essential items:
- Non-metallic Mixing Bowl: Use a glass, plastic, or ceramic bowl for preparing the henna mixture. Metal can interfere with the dye release process.
- Applicator Brush or Comb: A brush or comb designed for hair application helps distribute the henna evenly, ensuring every strand is coated.
- Gloves: Henna can stain your hands, so wearing gloves is essential to protect your skin during the application.
- Old Towels or Cloths: Cover your shoulders with old towels or wear a cape to prevent henna stains on your clothes.
- Plastic Wrap or Shower Cap: Once the henna is applied, covering your hair with plastic wrap or a shower cap helps retain heat, promoting better dye absorption.
- Clips or Hair Ties: Sectioning your hair is crucial for an organized application. Use clips or hair ties to separate your hair into manageable portions.
- Timer: Keep track of the application time to ensure you achieve your desired color intensity without over-processing.
Now follow these step-by-step instructions for a successful henna application:
- Section Your Hair: Divide your hair into manageable sections. Start from the bottom layers and work your way up. Clip or tie each section to keep it separate.
- Apply a Protective Barrier: If you want to prevent henna stains on your forehead, ears, or neck, apply a thin layer of petroleum jelly or a natural oil like coconut oil around your hairline.
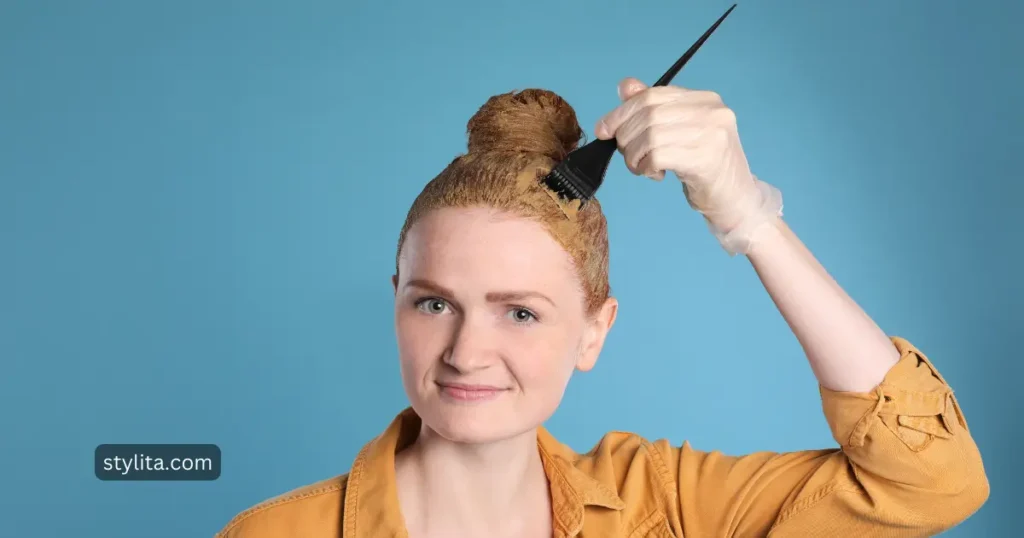
- Begin Applying Henna: Using the applicator brush or comb, start applying the henna from the roots to the tips of each section. Ensure thorough coverage, working the mixture into the hair.
- Repeat for Each Section: Continue applying henna section by section until your entire head is covered. Take your time to ensure even distribution.
- Gather Hair on Top: Once all sections are covered, gather your hair on top of your head. This helps in containing the hair and prevents it from sticking to other sections during the dye release process.
- Cover with Plastic Wrap or Shower Cap: Wrap your henna-covered hair with plastic wrap or wear a shower cap. This traps heat, allowing the henna to release its dye effectively.
- Set a Timer: The recommended processing time varies depending on the henna type and desired color. Check the instructions on your henna package and set a timer accordingly.
- Rinse Out Thoroughly: After the processing time is complete, rinse your hair thoroughly with water until the henna is completely removed. Avoid using shampoo immediately after rinsing.
Achieving even distribution of henna is crucial for uniform color results. Follow these tips:
- Work Methodically: Take your time and work systematically through each section, ensuring complete coverage before moving on.
- Use a Comb for Thick Hair: If you have thick hair, use a wide-toothed comb to help distribute the henna evenly, ensuring it reaches every strand.
- Massage the Mixture In: Massage the henna mixture into your hair as you apply it. This ensures better penetration and coverage.
- Check in the Mirror: Periodically check in the mirror to ensure you haven’t missed any spots, especially around the back and sides of your head.
Determining Duration
There are certain factors which determine the processing time for achieving desired color and conditioning effects:
- Henna Type: Different types of henna may require varying processing times. Check the instructions on the henna package for recommended durations, as some henna varieties release dye faster than others.
- Temperature: Warmer temperatures generally expedite the dye release process. If you’re in a warmer environment, the henna may reach its peak potency sooner. Conversely, colder temperatures may lengthen the processing time.
- Hair Color and Porosity: The natural color of your hair and its porosity affect how well it absorbs henna. Lighter hair colors may show henna’s red tones more prominently, while darker hair colors might result in deeper, richer hues. Highly porous hair tends to absorb henna more quickly.
- Desired Color Outcome: If you’re aiming for a precise color change or conditioning treatment, a shorter processing time will work. For more intense color, a longer duration is recommended. Experimentation with processing times allows you to customize the results based on your preferences.
The type and texture of your hair also determines the ideal processing time for henna:
- Fine and Straight Hair: Fine hair generally absorbs henna more quickly than coarser hair types. Straight hair may showcase henna’s color more prominently, and a shorter processing time could suffice.
- Curly and Coarse Hair: Curly and coarse hair may benefit from a longer processing time to ensure thorough dye penetration. These hair types tend to be more resistant, requiring additional time for the henna to work its magic.
- Gray Hair: Gray or white hair often requires a longer processing time to achieve optimal color coverage. The cuticle of gray hair is typically more closed, necessitating extended exposure to the henna for effective color absorption.
The depth of color depends on your personal preference and plays a key role in determining the processing time:
- Subtle Color: If you’re seeking a more subtle change or just aiming for the conditioning benefits of henna, a shorter processing time, typically around 1-2 hours, may be sufficient.
- Rich Color: For a more intense and vibrant color, consider leaving the henna on for a longer duration, anywhere from 2 to 4 hours or even overnight. This allows for a deeper dye release and enhances the longevity of the color.
- Experimentation: It’s advisable to perform strand tests and gradually experiment with processing times to find the duration that yields your desired color intensity. Keep notes on each experiment to track the results and refine your approach over time.
Recommended Duration for Different Hair Types
Different hair types have different duration recommendations depending on these factors:
Fine and Straight Hair
Fine and straight hair tends to absorb henna more quickly due to its smooth cuticle structure. Here are recommendations for processing time:
- Short Duration (1-2 hours): If you have fine and straight hair and desire a more subtle color change or simply aim for the conditioning benefits of henna, a shorter processing time of 1-2 hours may be sufficient. This allows the henna to impart a delicate tint without overwhelming your natural color.
- Medium Duration (2-3 hours): For those seeking a slightly deeper hue, consider leaving the henna on for 2-3 hours. This extended time provides a balance between vibrant color and efficient absorption.
- Long Duration (3-4 hours or overnight): If you desire a more pronounced color outcome, you can experiment with leaving the henna on for 3-4 hours or even overnight. However, it’s essential to monitor the process to avoid over-saturation.
Curly and Coarse Hair
Curly and coarse hair types often require a longer processing time to ensure thorough color penetration. Consider the following recommendations:
- Medium Duration (2-3 hours): A processing time of 2-3 hours is generally suitable for curly and coarse hair. This allows the henna to work through the resilient structure of these hair types, providing ample time for optimal color development.
- Long Duration (3-4 hours or overnight): For a more intense color outcome, particularly if you have dense or tightly coiled curls, you may opt for a longer processing time of 3-4 hours or leave the henna on overnight. This extended duration ensures that the henna has sufficient time to permeate the hair shaft.
Tips for Gray Coverage
Gray or white hair often requires special attention, as it can be resistant to color uptake. Here are tips for achieving effective gray coverage:
- Pre-soak Gray Hair: Pre-soak your gray or white hair in warm water for 10-15 minutes before applying henna. This helps open the cuticle and facilitates better dye absorption.
- Extended Processing Time: Gray hair typically benefits from a longer processing time. Aim for at least 3-4 hours or consider leaving the henna on overnight to achieve comprehensive gray coverage.
- Regular Touch-Ups: Since gray hair tends to grow quickly, regular touch-ups may be necessary to maintain consistent color. Consider reapplying henna every 4-6 weeks or as needed.
- Mix with Indigo for Darker Shades: If you prefer darker shades, you can mix henna with indigo. This combination not only intensifies the color but also helps achieve more effective gray coverage.
Monitoring the Henna Process
Monitoring the henna process is the integral part to achieve desired results. Following are the key points to ensure that henna is working efficiently:
- Color Change: As the henna begins to release its dye, you’ll notice a gradual change in color. This can range from an initial orange hue to deeper reds, browns, or blacks, depending on the type of henna and your hair color.
- Texture Improvement: Henna not only colors but also conditions the hair. During the process, you may feel your hair becoming softer, smoother, and more manageable. This is a positive sign that the henna is nourishing your hair.
- Warmth and Tingling: Some individuals experience a mild warmth or tingling sensation on their scalp during the henna process. This is normal and often a sign that the henna is interacting with your hair and skin.
- Visible Coating: As you apply henna, you’ll notice a visible coating on your hair strands. This coating is an indication that the henna is adhering to the hair shaft, providing the conditioning and coloring effects.
- Release of Dye on Fabric: If you wrap your henna-covered hair in a cloth or wear a shower cap, you might observe dye transfer onto the fabric. This is a positive sign that the henna is actively releasing its color.
As henna is a natural treatment so you must avoid over-processing. This can lead to undesirable outcomes. Following are the points how you can avoid over-processing:
- Follow Recommended Time: Stick to the recommended processing time as indicated on your henna package or based on your previous experiences. Exceeding the suggested time may lead to overly intense color or dryness.
- Perform Strand Tests: Before applying henna to your entire head, conduct strand tests on a small section of hair. This allows you to gauge how your hair responds to the henna and determine the optimal processing time.
- Check Color Development: Regularly check the color development during the henna process. If you’ve achieved your desired color before the recommended processing time is complete, consider rinsing out the henna early to avoid oversaturation.
- Hair Sensitivity: Pay attention to how your hair feels during the process. If your hair starts feeling excessively dry or brittle, it might be a sign of over-processing. In such cases, consider reducing the processing time in future applications.
- Adjust Processing Time: If you notice your hair becoming overly red or if the color is too intense, adjust the processing time for subsequent applications. You can experiment with shorter durations to achieve a more subtle effect.
Rinsing Out Henna
Rinsing out henna is a crucial step in the process to reveal the final color and ensure optimal hair health. Follow these steps for a proper rinsing technique:
- Use Lukewarm Water: Begin by rinsing your hair with lukewarm water. Avoid using hot water, as it can strip the henna from the hair prematurely and may lead to dryness.
- Finger Comb Through Hair: While rinsing, gently finger comb your hair to remove the henna residue. This helps in detangling and ensures that the henna is evenly distributed.
- Repeat Rinsing: Continue rinsing your hair until the water runs clear. It may take several rounds of rinsing to remove all henna particles from your hair.
- Mild Shampoo (Optional): If desired, you can use a mild sulfate-free shampoo during the final rinse to ensure any remaining henna is thoroughly washed out. However, some individuals prefer to skip shampooing to maintain the conditioning effects of henna.
- Patience is Key: Take your time during the rinsing process to ensure that all henna is thoroughly washed out. Rushing may result in incomplete removal and affect the final color outcome.
After rinsing out the henna from your hair, follow these post-henna care tips to maintain the health and vibrancy of your colored hair:
- Avoid Frequent Washing: Try to space out your hair washes to maintain the longevity of the henna color. Using sulfate-free and color-safe shampoos can also contribute to color retention.
- Protect Your Hair from the Sun: UV rays can fade hair color, so protect your henna-treated hair by wearing a hat or using products with UV protection when spending extended periods in the sun.
- Use Heat Protectant: If you frequently use heat styling tools, apply a heat protectant before styling to minimize damage and preserve the color.
- Deep Conditioning Treatments: Periodically indulge in deep conditioning treatments to keep your henna-treated hair healthy and nourished. Consider using natural oils or specialized deep conditioning products.
- Avoid Harsh Chemicals: Minimize exposure to chlorine and harsh chemicals, as they can affect the color and health of henna-treated hair. If swimming in chlorinated water, wear a swim cap to protect your hair.
Common Issues and Troubleshooting
Uneven Color Distribution
Uneven color distribution can be a common issue during henna application. Here’s how to address it:
- Section Hair Carefully: Ensure that your hair is thoroughly and evenly divided into sections during application to guarantee consistent coverage.
- Apply More Henna: If you notice certain areas with lighter color, consider applying additional henna specifically to those sections. Ensure the new application blends seamlessly with the existing color.
- Check Mixing Consistency: Uneven color may result from inconsistent henna mixing. Confirm that your henna mixture has a smooth and uniform texture.
Allergic Reactions
While henna is generally well-tolerated, some individuals may experience allergic reactions. If you notice any adverse effects:
- Stop the Application: Immediately stop the henna application if you experience itching, redness, or irritation.
- Rinse Thoroughly: Rinse out the henna from your hair and scalp using lukewarm water.
- Use Antihistamines: If itching persists, consider taking over-the-counter antihistamines to alleviate symptoms.
- Seek Medical Advice: If the reaction is severe, consult a healthcare professional for guidance. They can recommend appropriate treatments and help determine the cause of the allergic response.
Henna Staining on Skin
Henna staining on the skin is a common occurrence. To manage henna stains:
- Preventive Measures: Apply a layer of petroleum jelly or a barrier cream around your hairline, ears, and neck before henna application to minimize skin staining.
- Immediate Cleaning: If henna comes into contact with the skin, wipe it off immediately using a damp cloth. Do not let it sit on the skin for an extended period.
- Exfoliation: For residual staining, use a gentle exfoliant to help remove henna from the skin. Avoid harsh scrubbing, as it may irritate the skin.
- Oil Application: Apply natural oils, such as olive oil or coconut oil, to the stained areas. Allow the oil to sit for some time before gently wiping it away.
- Time for Natural Fading: Henna stains on the skin will naturally fade over time. Regular washing and exfoliation can expedite this process.
Conclusion
In summary, henna is a fantastic natural way to color and care for your hair. From picking the right henna type to applying it properly and taking care afterward, you’ve got the tools for a successful journey. So, embrace the beauty of henna – it’s not just about color but also about keeping your hair healthy and vibrant. Enjoy the simple magic of nature in your hair care routine!
Frequently Asked Questions (FAQs)
Is Henna Dye Permanent?
Henna dye is semi-permanent. Synthetic hair dye reaches the hair shaft and changes the color permanently. But henna coats the outer layer of the hair which is protective and conditioning for hair health. How long henna lasts depends on the following factors:
Natural Fade: Henna color naturally fades over time as the outer layer of the hair sheds through regular washing and exposure to the elements.
Frequency of Washing: Washing your hair less frequently can extend the life of henna color. Using sulfate-free shampoos and avoiding harsh chemicals can also help maintain the vibrancy.
Color Build-Up: With repeated henna applications, the color tends to deepen and become more pronounced. Some individuals find that their henna color improves with each application.
Gradual Fade: While henna doesn’t wash out completely, it gradually fades, allowing you to explore different shades or transition to a new color over time.
How Long Should You Leave Henna On Your Hair?
The ideal time to leave henna on your hair depends on various factors, including your hair type, desired color intensity, and the type of henna used. For fine and straight hair, 1.5 to 2.5 hours is often enough, while those with curly or coarse hair might benefit from 2.5 to 4 hours or even overnight. Gray hair may require longer processing, around 3 to 4 hours. It’s crucial to monitor the color development during the process and consider strand tests to find the perfect duration for your hair. Experimentation helps customize your henna experience for the best results.
What Happens If You Leave Henna On Your Hair For Longer?
Leaving henna on your hair for longer than the recommended processing time may lead to an overly intense color. While some people prefer a deep color, prolonged exposure can result in shades that are too dark or even become brassy. It’s essential to monitor the color development during the process and follow the recommended time to avoid over-saturation.
How Often Should You Reapply Henna?
The frequency of henna application depends on personal preferences and hair growth. For maintaining color vibrancy, applying henna every 4 to 6 weeks is common. However, if you’re using henna primarily for conditioning benefits and not intense color, spacing applications further apart is suitable. Regular henna users often find that color deepens with each application.
How To Apply Henna On Hair The Right Way?
To apply henna on hair correctly, start with clean, dry hair. Section your hair and prepare a henna mixture with the right consistency. Apply the henna evenly, ensuring thorough coverage from roots to tips. Sectioning the hair aids in a systematic application. Use gloves to protect your hands, and cover your hair with plastic wrap or a shower cap for better dye release. Follow the recommended processing time, rinse thoroughly, and use conditioner for added softness. Regular experimentation and monitoring contribute to mastering the art of henna application.